When I go mountain bike riding I do usually try to clean my bike when I get home, but to be honest, I don’t do so with a plan. That means I don’t really do a great job. That’s why I found this article written by our very own SSoDer, Ty Holland, so helpful. Enjoy the read!
~Cat
Home Bicycle Maintenance
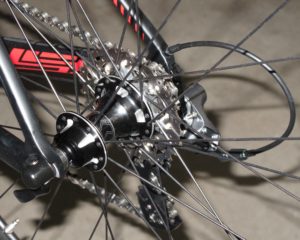
(Article and photograph by Ty Holland)

With modern bicycles, maintenance is a very important part of the overall bicycling experience. The latest bicycle designs have up to thirty speeds, indexed shifting and integrated brake/shift levers. Home bicycle maintenance requires a portable bicycle repair stand, specific tools and a tire pump.
Before starting any maintenance, a light bicycle cleanup is required. Use a damp cloth to remove road/trail grime from the frame, fork, rims, derailleurs, crank arms, brakes, stem and handlebar. Now you can work on your bicycle without getting dirty.
Tires should be inflated to the recommended air pressure listed on the tire. For most bicycles, tire pressure should be checked before each ride. Inspect tires for cuts, thorns and uneven wear. Replace worn-out tires quickly to avoid tire failures during a bicycle ride. Also, replace the tube when changing out tires.
Brake adjustments are important for quality stops. The brake pads should be adjusted close to the rim without touching the rim during wheel rotation. In addition, brake cables should be adjusted for minimal slack. Inspect brake pads for wear and replace as needed. Clean the rims with a cloth soaked in dish soap, then rinse and dry. This will remove road/trail grime from the rims, which interferes with stopping power.
Bicycle chains require proper lubrication to function correctly. Use a bicycle specific chain lube regularly. In general, lubricate the chain whenever it starts to make noise during shifting. The best way to apply lubricant to a chain is to apply one drop of lube to each rivet/bushing. Be careful over lubrication will attract more dirt.
Gear shifting adjustments can be difficult and require two steps. The first step is adjusting the derailleur’s limit stop screws. These stop screws are labeled “H” (high) and “L” (low). Adjust limit stop screws on the front derailleur when the chain is shifting past the smallest or largest chain-wheel. For the rear derailleur adjust limit stop screws when the chain is shifting past the smallest or largest sprocket. The second step is adjusting the shift indexing. Each index stop corresponds to one position of the derailleur. The indexing adjustment is an adjusting barrel located at one end of a length of cable controlling the derailleur. The cable tension may need to be adjusted for proper shifting between gears.
This article covers basic bicycle maintenance. As you’re already aware I’m sure additional bicycle maintenance information and free how-to videos can be found on-line. For complex bicycle repairs or complete overhauls, a visit to the local bicycle shop may be in order.
Enjoy the ride, indoors or out!


Comments - 0